Sunday, July 5, 2026

Waldorf Salad

It has been on my list for a while to write up a recipe for Waldorf Salad.  As another summer farmer's market season has started here in New England, here's another recipe where local apples, celery, grapes and lettuce can be used. 

According to Wikipedia, “A Waldorf salad is a fruit and nut salad generally made of celery, fresh apples, walnuts, and grapes, dressed in mayonnaise, and traditionally served on a bed of lettuce as an appetizer or a light meal. The apples, celery, and grapes can all be green, which harmonizes the color palette of the dish.” 

The version listed below is from my Fanny Farmer Cookbook and notes “Sometimes it's pleasing to have two different kinds of apples in a Waldorf salad, if the season is right and you can get different varieties like a sweet Delicious and a tart greening. In any case, be sure the apples you use are crisp.” 

Waldorf Salad (serves four) 

From the revised 13th edition of The Fanny Farmer Cookbook. 

2 firm ripe green apples 
1 firm ripe red apple 
1 tablespoon lemon juice 
1 cup sliced celery 
½ cup coarsely chopped walnuts 
½ cup mayonnaise 
1 ½ teaspoons honey (optional) 
Iceberg or Bibb lettuce leaves 

Core and quarter the apples (leave the skin on unless it is tough) and slice thin.   Put apples in a bowl and toss with the lemon juice to coat.   Add the celery and walnuts.  Cover and chill.  Mix the mayonnaise and honey (if you like a little sweetness in the dressing) together until smooth, add to the apple mixture, and toss.  Serve on a bed of lettuce.

Saturday, May 30, 2026

German Chocolate Brownies 

On a recent perusal of recipes, I came across this one which I found over 10 years ago from the Duncan Hines website. I don't make this recipe very often but it is well like by German Chocolate Cake fans. 

German Chocolate Brownies 

½ cup (1 stick) butter plus 2 tablespoons 
1 large egg 
¼ cup water 
1/3 cup brown sugar 
1 tablespoon all-purpose flour 
1/3 cup chopped pecans 
1/3 cup flaked coconut 

Place oven rack on middle run setting. Preheat oven to 350 degrees farenheit.  

Grease 8-inch x 8-inch pan. 

In medium to large microwave safe bowl place ½ cup (1 stick) butter and melt in microwave. Add brownie mix, eggs and water. Stir until well blended (about 50 strokes by hand) 

Spread batter evenly into greased pan. 

In small bowl microwave safe bowl place remaining 2 tablespoons of butter and melt in microwave. Add brown sugar and flour and mix until well blended. Stir in pecans and coconut. Sprinkle mixture over batter. 

Place brownies in middle of oven rack and bake for 35 – 38 or until topping is browned. Cool completely in pan prior to cutting and serving. Store any leftovers in air tight container.

Sunday, March 29, 2026

Basic Fried Rice – Julie's Version (makes 2 servings)

Two decades ago, I made Fried Rice at home using a recipe I cut out of a newspaper which I think was part of an advertisement for Success Boil in a Bag Rice and Kikkoman Soy Sauce. I was amazed at how well the dish turned out and how much it made. After a week of eating Fried Rice, I had no desire to make this dish again. Fast forward to this past December when I needed to do something with two eggs, some chicken and an onion I bought the prior month from the local farmer's market and back to this recipe I came. 

If you run a google search for Success rice fried rice recipes or fried rice recipes there is no shortage of recipes to choose from based on whether you are vegetarian, vegan or not, or if there are specific vegetables you prefer over others. As with my dilemma this past December and as of my girlfriends do regularly, combining the left over meat and vegetables with rice makes a quick meal and prevents food waste. 

This is a variation of the Fried Rice recipe many years ago using the ingredients I had at hand this past December. To reduce the amount of sodium in this recipe, I used Coconut Aminos and ground black pepper instead of Soy or Tamari sauces. 

Basic Fried Rice – Julie's Version (serves 2) 

1 cup cooked rice (brown, jasmine, basmati, white) or 1 bag Success boil in bag rice, cooked 
3 tablespoons canola oil 
¼ – ½ cup chopped onion (if you want less onion, use the smaller amount) 
1 – 2 eggs beaten 
½ cup chopped cooked shrimp, chicken, ham or beef (optional) 
½ cup frozen peas (optional, if you're using 2 eggs) 
½ teaspoon garlic powder 
1 ½ tablespoons soy sauce, tamari sauce or coconut aminos 
Ground Black Pepper (optional) 

Heat oil in medium to large skillet over medium-high heat. Add onion; saute 1 minute. Add eggs, scramble. Reduce heat to medium and fold in shrimp or meat (if using), peas (if using), garlic, rice and soy sauce, tamari sauce or coconut aminos. Heat through. Season with black pepper to taste. Serve. Store any used portions in refrigerator in air tight container.


Fried Rice with Egg, Onion and Peas ready to serve

Sunday, January 18, 2026

Buffalo Cauliflower Florets or a vegetarian appetizer for those who like it hot

Several years ago a I received an e-mail from the Kripalu Center for Yoga and Health with a recipe for Buffalo Cauliflower. Upon a quick skim, I determined it was keeper as I could easily make it dairy free. For several years it sat in my e-mail until I had a head of cauliflower I needed to do something with. 

If you don't like super spicy food stop reading at this point as this not the recipe for you. In addition to substituting the dairy in the recipe, I swapped the hot sauce for tabasco sauce, and doubled the amount of garlic and pepper. The end result numbed my tongue after six or seven florets. 

Below is my version of this recipe. The original version is available here. 

Buffalo Cauliflower Florets, Julie's version 

1 medium-sized head cauliflower broken into florets 
½ – 1 teaspoon ground black pepper 
½ – 1 teaspoon garlic powder 
4 tablespoons butter substitute such as Earth Balance Buttery Spread 
5 ounces McIlhenny Co Tabasco Original Red Sauce (this is a whole bottle) 
¾ cup water 

Place oven rack on middle rung. Pre-heat oven to 350 degrees farenheit. 

Line a 15-inch by 10-inch cookie sheet with aluminum foil. Set aside. 

In a large bowl, combine flour, pepper and garlic powder. Gradually add water while whisking. Batter should be slightly thinner than pancake batter. 

Toss cauliflower florets in batter until coated and place on cookie sheet, slightly apart. (Use your best judgement as to how many cauliflower florets to coat at one time. In other words, doing this multiple times is okay.) 

Bake coated cauliflower florets 20 minutes. 

While coated cauliflower florets are baking, in a small sauce pan, melt butter or butter substitute over medium heat. Remove from heat and tabasco sauce. Remove coated cauliflower florets from over. Loosen coated cauliflower florets gently from cookie sheet with spatula. If needed, reheat butter mixture over low-medium heat until melted. Pour butter mixture evenly over coated cauliflower florets.

Bake coated cauliflower florets for additional 10-15 minutes or until the wings have slightly browned.

Remove from oven. Cool for 5-10 minutes. Serve. Store any unused portion in air tight container in refrigerator.

Saturday, November 29, 2025

Quick Asian-Style Broccoli (serves 2)

This is a variation of the “Stir-Fried Broccoli with Garlic” recipe from the 2012 edition of the America's Test Kitchen Quick Family Cookbook. I found it a great way to cook up the stems and stalk of a head of broccoli in less than 30 minutes. 

If you're unfamiliar with the parts of a head of broccoli or are unsure what's the stalk or the stem, I suggest this link to A Veggie Venture's website which has an excellent description of broccoli anatomy as well as how to prepare a head of broccoli for cooking. 

Quick Asian-Style Broccoli (serves 2) 

2 cups broccoli (florets, stems, stalk) diced small 
1 ½ tablespoons canola or olive oil 
1 ½ teaspoons minced garlic 
1 tablespoon soy or tamari sauce 
¼ plus 1/8 cups of water 

Using a skillet large enough for broccoli and ¼ cup of water, cook broccoli and water in covered skillet over high heat until broccoli starts to soften, about 4 – 4 ½ minutes. If more time appears to be needed, add remaining 1/8 cup of water and continue to cook in covered skillet until broccoli softens. 

Uncover and continue to cook water evaporates. Move broccoli to center of skillet. 

Reduce heat to medium. Add oil and garlic. Quickly stir for about 30 seconds to coat broccoli.  Stir in soy or tamari sauce. 

Serve. Store any unused portion in air tight container in refrigerator.


Asian-Style Broccoli 
ready to serve

Saturday, September 27, 2025

Removing and freezing fresh corn on the cob or “the girlfriends know how to do this without buying any new kitchen tools.”

Where I live in New England, most of the local farms start harvesting and selling their corn on the cob in August.  As a child, I would drive to the local farm with grandmother on these August mornings to select the ears of corn, picked earlier that morning, for that evening's dinner.  It was a favorite meal of mine as a kid. 

After making my first Black Bean, Corn and Butternut Squash casserole I contemplated what the process would be to freeze fresh local corn. In discussing this with my girlfriends Sarah and Sally, they offered these gems:  Use an angel food cake pan to steady the cob and catch your kernels as you remove them and you don't need to cook the corn before freezing,--just remove the kernels, freeze them and use them like frozen corn from the supermarket.  They were right. Using my angel food cake pan to remove the kernels, freezing them and using them just like frozen corn worked wonderfully. 

I will advise if this is your first time trying this, go very slowly as there it's a bit of a balancing act between you, the corn cob and the knife.  Also, don't be dismayed if the kernels come off the cob in “groups” and not one by one. This is remedied by breaking the kernels apart before freezing.  

If you're uncomfortable with the idea of using a knife to remove kernels from a corn cob, there are plenty tools available to do this job. Just replace step three, below, with instructions from tool.  

To freeze fresh corn on the cob, you’ll need: 

-- Sandwich size ziploc storage bags,--I recommend one bag per corn cob 
-- Quart or Gallon size freezer safe ziploc storage bags,--one quart size bag will hold 4 sandwich size bags of corn kernels 
-- Knife 
-- Solid, stable, flat, level surface to prop ear of corn on Angel food cake pan with funnel center (if possible)  

1) Husk the corn, removing as much silk as possible. If using angel food cake pan, leave enough shank to insert into funnel of cake pan. If not using angel food cake pan make sure shank end of corn ear is level when placed on flat level surface.   

2) If using angel food cake pan, insert shank of corn cob into funnel of cake pan making sure it's stable. If not using angel food cake pan place shank end of corn ear on flat level surface.  

3) Using knife, carefully slice kernels off corn cob in a slow downward motion. Don't worry if the kernels come off the cob in “groups” and not one by one. Repeat until majority of kernels have been removed from corn cob.  

4) For the kernels which came off the cob in “groups”, carefully break apart using your fingers.  

5) Place corn kernals in ziploc sandwich bag. One bag per corn cob recommended.  

6) Repeat steps 2 – 5 as many times as needed.  

When all corn cobs have been stripped of kernels and the kernels bagged, seal sandwich bags.  Put sandwich bags into freezer safe quart or gallon size ziploc bag. You should be able to fit 4 bags of corn into one quart size bag. Seal freezer safe bag and put in freezer.  

The corn will last about 2 – 3 months and can be used like frozen corn.  Keep in mind, the longer the corn is in the freezer they more likely it is to lose flavor.

Saturday, July 12, 2025

Freezing tomatoes

As the local tomatoes come into season here in New England, I'm known for buying more tomatoes than I can use before they go bad. On the recommendation of a girlfriend, I started dicing them and freezing them for later use in dishes such as black bean sloppy joe or eggplant, meat and tomato with spices. I will note I've only done this with “regular” tomatoes or the round red tomatoes with a relatively sturdy skin. 

To freeze tomatoes, you’ll need: 

Sandwich size ziploc storage bags,--I recommend one bag per medium/large tomato 
Quart or Gallon size freezer safe ziploc storage bags,--one quart size bag will hold 3 - 4 diced tomatoes
Knife 
Cutting board 

Wash and dry tomatoes. 

Dice tomatoes and place in ziploc sandwich bag. One bag per tomato recommended. Repeat as many times as needed. 

When all tomatoes have been diced and bagged, seal sandwich bags. 

Put sandwich bags into freezer safe quart or gallon size ziploc bag. You should be able to fit 3 - 4 bags of tomatoes into one quart size bag. Seal freezer safe bag and put in freezer. 

The tomatoes will keep for about 4 – 6 months and can be used in most recipes which call for cooking diced tomatoes such as black bean sloppy joe and eggplant, meat and tomato with spices. Keep in mind, the longer the tomatoes are in the freezer they more likely they are to lose flavor. 

When ready to use, remove the number of tomatoes/bags from the freezer. Let thaw on the kitchen countertop for 3 - 15 minutes or until you can break up diced tomatoes with hands while in bag on countertop. Open bag and add tomatoes to recipe.


Diced tomatoes, ready for the freezer

Sunday, May 4, 2025

Whole wheat flat bread

Whole wheat flat bread (makes 4 – 6 servings) 

Several years ago I was in search of a bread recipe which didn't require me to light the oven. As much as I love homemade bread I don't love having to light the oven during a hot summer. The results of this search was this recipe which is a no knead, stove top flat bread which can be made in under an hour. Unfortunately, I don't remember which recipes I found in my search which inspired this one. The result is a rich tasting bread. Depending upon the size of your flat bread this recipe yields 4 – 6 servings. 


Whole wheat flat bread (makes 4 – 6 servings) 

2 cups plus ¼ cup whole wheat flour 
½ teaspoon salt or 1/8 – 3/8 teaspoon kosher salt 
3 ½ tablespoons butter, olive oil or canola oil 
¾ cup milk or vegan beverage substitute 
½ tablespoon olive or canola oil 

Place butter/oil and milk in a large microwave safe bowl. Heat until butter is melted about 45 seconds to 1 minute. Lightly stir to combine. 
 
Mix in 2 cups flour and salt to make dough. Let dough rest at room temperature for 5 to 30 minutes. 
 
Cut dough into equal size pieces. Roll each piece into a ball. Flour dough ball lightly using remaining ¼ cup flour and then roll into 1/8 inch round between two sheets of waxed paper. Carefully lift both pieces of wax paper from dough. Hang rolled flat bread over side of mixing bowl. Repeat until all pieces have been rolled flat. 
 
Heat ½ tablespoon olive or canola oil in non-stick pan over low-medium heat. 
 
Place one flatbread in pan, cook for 1 – 1 ½ minutes,--it may bubble,--flip to other side pressing down with a spatula if it puffs. Bread is cooked when there are smallish golden brown spots on both sides. 
 
Placed cook bread on cooling rack or cutting board. Repeat with all pieces of flatbread. 
 
Serve and store any leftover bread in airtight container in refrigerator for up to 1 week. 
 
Not quite round flatbread 
ready to serve
 

Saturday, March 29, 2025

Chickpea flour flat bread

 On a recent shopping trip, I needed to pick up more chickpea or garbanzo bean flour as I'd used the last of what I had in the house to make buffalo cauliflower. The original recipe for this flat bread was on the back of the garbanzo bean flour bag. 

Known by several different names in Europe, Northern Africa and South America, including Socca and Farinata, this is a savory, quick and versatile recipe whose batter can be used to make crackers or pizza dough as well as a bread. It is also dairy, gluten, corn, soy and yeast free. 

Chickpea flour flat bread (makes one 10-inch flatbread) 

1 cup chickpea or garbanzo bean flour 
¼ teaspoon black pepper 
¼ teaspoon garlic powder (optional) 
1 cup warm water 
1 tablespoon olive or canola oil 
1 teaspoon italian seasoning or other fresh or dried herbs (optional) 
Non-stick cooking spray 

In a medium-size bowl, mix the garbanzo bean flour, pepper and garlic powder. Whisk the water and oil into the flour mixture until completely combined. Add italian seasoning or other herbs and lightly whisk until combined. Set aside. 

Place oven rack on middle rung. Preheat oven to 450 degrees farenheit. Place 10-inch or larger oven safe skillet in oven for 5 minutes as oven preheats. 

Remove skillet from oven and liberally spray with non-stick cooking spray. Pour batter into center of heated pan. Bake in oven for 10-15 minutes or until set and golden brown. 

If making bread, use a wide spatula to remove bread from pan. Cool 1 minute and serve. 

If making pizza, top flatbread with your favorite pizza toppings and return to oven for an additional 5 to 15 minutes watching carefully to ensure toppings don't burn. Remove from pan using a wide spatula. 

Cool 1 minute and serve. Serve and store any leftover bread in airtight container in refrigerator for up to 1 week.


Chickpea flour flatbread cooling before serving

Sunday, January 12, 2025

Oatmeal Raisin Cookies (makes about 18 – 24 cookies)

This is a quick drop cookie recipe which is a variation of a Cowboy Cookie (a basic oatmeal chocolate chip cookie in this case) recipe which appeared in the September 16, 1992 edition of the Boston Globe. The smaller you make the cookies, the higher the yield. 

Oatmeal raisin cookies 
¼ cup (1 stick) butter or margarine 
½ cup white sugar 
½ cup brown sugar 
1 egg 
1/2 teaspoon vanilla extract  
1 ½ cups quick cook oats 
1 cup all-purpose flour 
1/4 teaspoon baking soda 
¼ teaspoon baking powder 
1 cup raisins 

1) Place oven rack on middle rung and pre-heat oven to 350 degrees farneheit. 

2) In a large mixing bowl cream butter, sugars. If using electric mixer, cream for 1 minute. 
3) Beat in egg, and vanilla extract. 
4) Stir in oats, flour, baking soda and baking powder.  

5) Drop dough by rounded tablespoons onto non-stick cookie sheet about 2 inches apart. Bake in oven for 10 – 15 minutes or until lightly golden. Remove from own and cool cookies on wire rack. 
6) Repeat step 5 as many times as needed. Serve or store cooled cookies in airtight container.

Saturday, December 28, 2024

White Chocolate Macadamia Nut Cookies

This is a variation of my Chocolate Chip Cookie recipe which I created after developing an intolerance for chocolate. Loving sweets as I do, this is one of my favorites quick cookie recipes. 

This makes about 24 - 36 cookies depending upon how big your rounded teaspoons are. If the butter is melted, not softened, the cookies will spread and flatten during baking resulting in a thinner, crispier cookie. 

½ cup butter
½ cup sugar 
¼ cup brown sugar 
1 large egg 
1 teaspoon vanilla extract 
1 cup flour 
½ teaspoon baking powder 
1 cup (6 ounces) white chocolate chips 
½ cup chopped macadamia nuts 

Place oven rack on middle run setting.  

Preheat oven to 375 degrees farenheit. 

In medium to large microwave safe bowl melt butter. 

Stir in sugars, eggs and vanilla extract by hand lightly until combined. 

Stir in flour and baking powder until well blended. 

Add white chocolate chips and gently mix until incorporated in batter (about 10 – 25 strokes if mixing by hand).  Add macadamia nuts and once again gently mix until incorporated in batter (about 10 – 25 strokes if mixing by hand). 

Drop dough by rounded teaspoons onto non-stick cookie sheet about 2 inches apart. 

Bake 10 – 12 minutes or until edges of cookies start to brown. 

Remove from pan immediately to cooling rack. 

Cool completely before serving. Store any leftovers in air tight container.

Saturday, November 16, 2024

Chocolate Chippers (or Chocolate Chip Cookies)

Chocolate Chippers is the name of the Chocolate Chip Cookie recipe in my mother's 7th edition Better Homes and Garden Cookbook. This is the first recipe I learned to make from scratch and is the basis for my Chocolate Chip Pan Cookies.  

This makes about 24 - 36 cookies depending upon how big your rounded teaspoons are.   If the butter is melted, not softened, the cookies will spread and flatten during baking resulting in a thinner, crispier cookie. 

½ cup butter 
½ cup sugar 
¼ cup brown sugar 
1 large egg 
1 teaspoon vanilla extract 
1 cup flour 
½ teaspoon baking powder 
1 cup (6 ounces) semi-sweet chocolate chips (optional) 
½ cup chopped walnuts or chopped pecans 

Place oven rack on middle run setting. 

Preheat oven to 375 degrees farenheit. 

In medium to large microwave safe bowl soften butter to make batter easier to mix. 

Stir in sugars, egg and vanilla extract by hand lightly until combined. 

Stir in flour and baking powder until well blended. 

Add chocolate chips and nuts (if using) and gently mix until incorporated in batter (about 10 – 25 strokes if mixing by hand). 

Drop dough by rounded teaspoons onto non-stick cookie sheet about 2 inches apart. 

Bake 10 – 12 minutes or until edges of cookies start to brown. 

Remove from pan immediately to cooling rack. 

Cool completely before serving. Store any leftovers in air tight container.

Sunday, October 27, 2024

M&M Cookies

Loving sweets as I do, this is one of my favorites quick cookie recipes. 

½ cup butter 
½ cup sugar 
¼ cup brown sugar 
1 large egg 
1 teaspoon vanilla extract 
1 cup flour 
½ teaspoon baking powder 

1) Place oven rack on middle run setting. Preheat oven to 375 degrees farenheit. 

2) In medium to large microwave safe bowl melt butter. 
3) Stir in sugars, egg and vanilla extract by hand lightly until combined. 
4) Stir in flour and baking powder until well blended. 
5) Add M&M candies and gently mix until incorporated in batter (about 10 – 25 strokes if mixing by hand). 

6) Drop dough by rounded teaspoons onto non-stick cookie sheet about 2 inches apart. 
7) Bake 10 – 12 minutes or until edges of cookies start to brown. 
8) Remove from pan immediately to cooling rack. 
9) Cool completely before serving. Store any leftovers in air tight container.

Saturday, September 28, 2024

Baked Kabocha Squash (whole and pieces)

According to Wikipedia, Kabocha squash “is hard on the outside with knobbly-looking skin … shaped like a squat pumpkin” but differs from Buttercup squash as it doesn't have a protruding cup or “turban” on the bottom. It has a very sweet flavor and a texture similar to a sweet potato. 

Cooked Kabocha squash can be used and eaten like other winter squashes such as butternut or acorn squash. 

If you've never had Kabocha squash (or cooked whole one) I suggest looking for pieces or quarters as a way to start/try this since the pieces are smaller, lighter and easier to handle due to how large this whole squash can be and how tough the skin is. 

Recipes for cooking both a whole and pieces of Kabocha are presented here. For both recipes, I recommend using a turkey roaster or like roasting pan as I found it helped getting the squash in and out of the oven. 

Baked Kabocha Squash Pieces 

1) Place oven rack on middle rung. 
2) Pre-heat oven to 400 degrees farenheit. 

3) Place squash, skin side down in deep baking dish/roasting pan. 
4) Fill baking dish/roasting pan with 1/8” water. 
5) Loosely cover (tent) baking dish/roasting pan with aluminum foil. 

6) Place in oven and cook 35 minutes - 1 hour 15 minutes or until squash in center of dish/pan is easily pierced with a fork. 

7) When squash is cooked to desired tenderness, remove from oven and let cool uncovered in dish/pan for 5 minutes. 
8) Transfer squash to cutting board and let cool until it can be comfortably touched with your fingers. 
9) Remove the cooked squash from the skin. 
10) Serve or use as you would other winter squashes. Store any unused cooked squash in airtight container in refrigerator. 

Baked KabochaSquash (Whole Squash) 

1) Place oven rack on middle rung. 
2) Pre-heat oven to 400 degrees farenheit. 

3) Rinse squash with water. Pat dry. 
4) Place wash and dried squash on flat surface. Using a paring knife, pierce squash 10 times in multiple places as this will prevent squash from exploding while it's in the oven. 
5) Place squash deep baking dish/roasting pan. 
6) Fill baking dish/roasting pan with 1/8” water. 
7) Place in oven and cook 35 minutes - 1 hour 15 minutes or until squash is easily pierced with fork in three places. Skin of the squash may brown or bubble from baking. 

8) When squash is cooked to desired tenderness, remove from oven and let cool uncovered in dish/pan for 15 minutes or until it can be comfortably touched with your fingers. 
9) Carefully cut the squash, removing the skin and scooping out the seeds. (Note, the same paring knife used to pierce squash in step 4 can be used for cutting.) 
10) Serve or use as squash as you would other winter squashes. Store any unused cooked squash in airtight container in refrigerator. 

11) If any part of the squash didn't cook to desired tenderness, follow recipe above to bake Kabocha Squash Pieces to get desired tenderness.

Saturday, August 24, 2024

Polka Dot or White Chocolate Chip Brownie Recipe

In an attempt to “do something different”, I decided to add white chocolate baking chips to my brownies to create a polka dot look. If you find yourself in this same mood, I've provided both my quick fudgy brownie and slow fudgy brownie recipes here. 

Polka Dot Brownies, quick version 

½ cup (1 stick) butter, softened or melted
2 large eggs 
¼ cup water
½ cup semi-sweet chocolate chips

Place oven rack on middle run setting. Preheat oven to 350 degrees farenheit.  

Grease 8-inch x 8-inch pan. 

In medium to large bowl add butter, brownie mix, eggs and water. Stir until well blended (about 50 strokes by hand).

Add semi-sweet and white chocolate chips until blended (about 10-15 strokes by hand).

Spread brownie mixture evenly into greased pan. 

Place brownies in middle of oven rack and bake for 31 – 34 minutes or until toothpick inserted in center comes out clean. 

Cool completely in pan until cutting and serving. Store any leftovers in air tight container. 

Polka Dot Brownies, slow version

½ cup (1 stick) and 2 tablespoons margarine or butter
6 tablespoons cocoa or carob powder
1 cup sugar
2 large eggs
1 teaspoon vanilla extract
¾ cup all-purpose flour

Place oven rack on middle run setting. Preheat oven to 350 degrees farenheit. 

Grease 8-inch x 8-inch pan. 

In a small medium saucepan or medium to large microwave safe bowl melt margarine or butter. Stir in sugar, eggs and vanilla extract by hand lightly until just combined. 

Stir in flour and cocoa or carob powder. Add white chocolate chips until blended (about 10-15 strokes by hand).

Spread brownie mixture evenly into greased pan. Place brownies in middle of oven rack and bake for 25 – 30 minutes or until toothpick inserted in center comes out clean. Cool completely in pan until cutting and serving. Store any leftovers in air tight container.

Sunday, July 28, 2024

Oreo Cookie Truffles in 3 – 4 ingredients (makes about 36 truffles)

It's been on my list for a while to write-up this recipe which I was introduced to many years ago by a good friend. In starting this write-up, I ran a search for other recipes like this and found quite a few. This is a versatile recipe, especially when it comes to covering or dipping. 

Oreo Cookie Truffles (makes about 36 truffles) 

33 original oreo cookies (this is one 13.29 – 13.3 ounce package
One 8 ounce package cream cheese 
One 10 – 12 ounce package white chocolate chips 
2 – 3 ounces baking chocolate (optional, for decorating) 

Line a large cookie sheet with wax paper. Set aside. 

Crush oreo cookies into crumbs by either using a food processor or putting cookies in resealable plastic bag and crushing them with a rolling pin.  If using a small to medium food processor, do this 10 – 12 cookies at a time until all cookies have been crushed. 

In a large bowl, thoroughly mix the cookie crumbs and cream cheese using a pastry blender. Refrigerate mixture for 30 minutes – 1 hour. 

Remove mixture from refrigerator.  Roll into 1-inch balls and place on lined large cookie sheet. 

Melt white chocolate chips in top of double boiler. 

Dip truffles in white chocolate, returning to lined cooking sheet. 

(Optional) Melt baking chocolate. Using a small spoon, drizzle small amount of chocolate over each truffle to decorate. 

Chill truffles in refrigerator approximately 1 ½ – 2 hours or until set. 

Store truffles in airtight container in refrigerator until ready to serve.

Sunday, June 30, 2024

No Sugar Added Homemade Applesauce

I detailed my love for homemade applesauce in my Applesauce with a Rosy Glow post. As my tastes have changed since that post many years ago, I've come to prefer a no sugar added homemade applesauce which I make every fall with locally picked apples. It's this applesauce I now use in my vegan whoopie pie, applesauce nut bread and no sugar added apple crisp recipes. 

This is my Applesauce with a Rosy Glow without the sugar and cinnamon,--a recipe I originally in the Boston Herald sometime in the 1990s. 

No Sugar Added Rosy Applesauce (yield: approximately 6 – 9 pints)  

5-6 pounds red-skinned applesauce (this is a ½ peck of apples) 
½ cup water 

To make “mash” on stovetop: 

  1. Wash, quarter and core the apples. 
  2. Place them in large saucepan with the water. 
  3. Cook over very low heat until the pulp softens and separates from the peel – from 30 minutes to an hour. Stir occasionally to avoid scorching. 
To make “mash” in the oven: 
  1. Place oven rack on lowest setting. 
  2. Pre-heat oven to 425 degrees farenheit. 
  3. Wash, quarter and core the apples placing them in a turkey roasting pan designed to hold 12 – 15 pound turkey. 
  4. Add water to apples in pan. 
  5. Tent/loosely cover top of roasting pan with aluminum foil, making certain reflective side of foil faces apples. 
  6. Carefully place tented roasting pan with apples and water in oven on rack on lowest setting. 
  7. Bake until pulp softens and separates from the peel without effort – from 30 minutes to just over an hour. 
Once “mash” is made: 
  1. Press “mash” through a food mill or colander. 
  2. Serve either warm or chilled. Refrigerate any unused portion for up to 5 days, freeze for up to 3 months or can the applesauce using the boiling-water method in steps 4 and 5. 
  3. Heat the applesauce until it boils. Ladle into clean, hot canning jars, leaving ½ inch of headspace at the top of each. 
  4. Close the jars and process in a water-bath canner with a rack for 20 minutes.


Canned unsweetened applesauce 
in the process of being
Labelled

Sunday, May 26, 2024

Onion Burgers, Julie's version (makes 5 – 6 burgers)

After reading an article on the Depression Burger of Route 66, I decided to make one. I didn't search for any recipes but used the information in this article to figure it out. It took a couple of tries, and if you like carmelized onions with your hamburger then I recommend trying this recipe. 

In my experimenting with recipe, I found a successful onion burger requires five things: thinly sliced onions, thin hamburger patties, a wide blade spatula like those used to flip homemade pancakes, a flat, smooth and sided cooking surface with a cover like a fry pan or electric skillet, and cooking burger to medium-well/well doneness. 

Onion Burgers (makes 5-6 burgers) 

One large onion, thinly sliced 
One pound ground beef 
Non-stick cooking spray if using non-stick fry pan or cooking surface 

1) Peel and thinly slice onion. 
2) If using non-stick fry pan or cooking surface, spray with non-stick cooking spray. 
3) Arrange onion slices into 5 – 6 circles on cooking surface. 
4) Bring cooking surface to medium heat level. 
5) Shape hamburger into 5-6 very thin patties approximately the same size of the onion circles on the cooking surface. Once each patty is shaped, place it atop corresponding onion circle. 
6) Using wide blade spatula, gently press each patty.  

7) Cover cooking surface and let burgers cook for 25-45 minutes or until there is no more grease/fat. 
8) Remove patties from cooking surface. Serve. 
9) Store any leftovers in airtight container in refrigerator.


Two onion burgers, cooked and 
ready to be served

Saturday, April 20, 2024

No Sugar Added Apple Crisp (makes 2-4 servings)

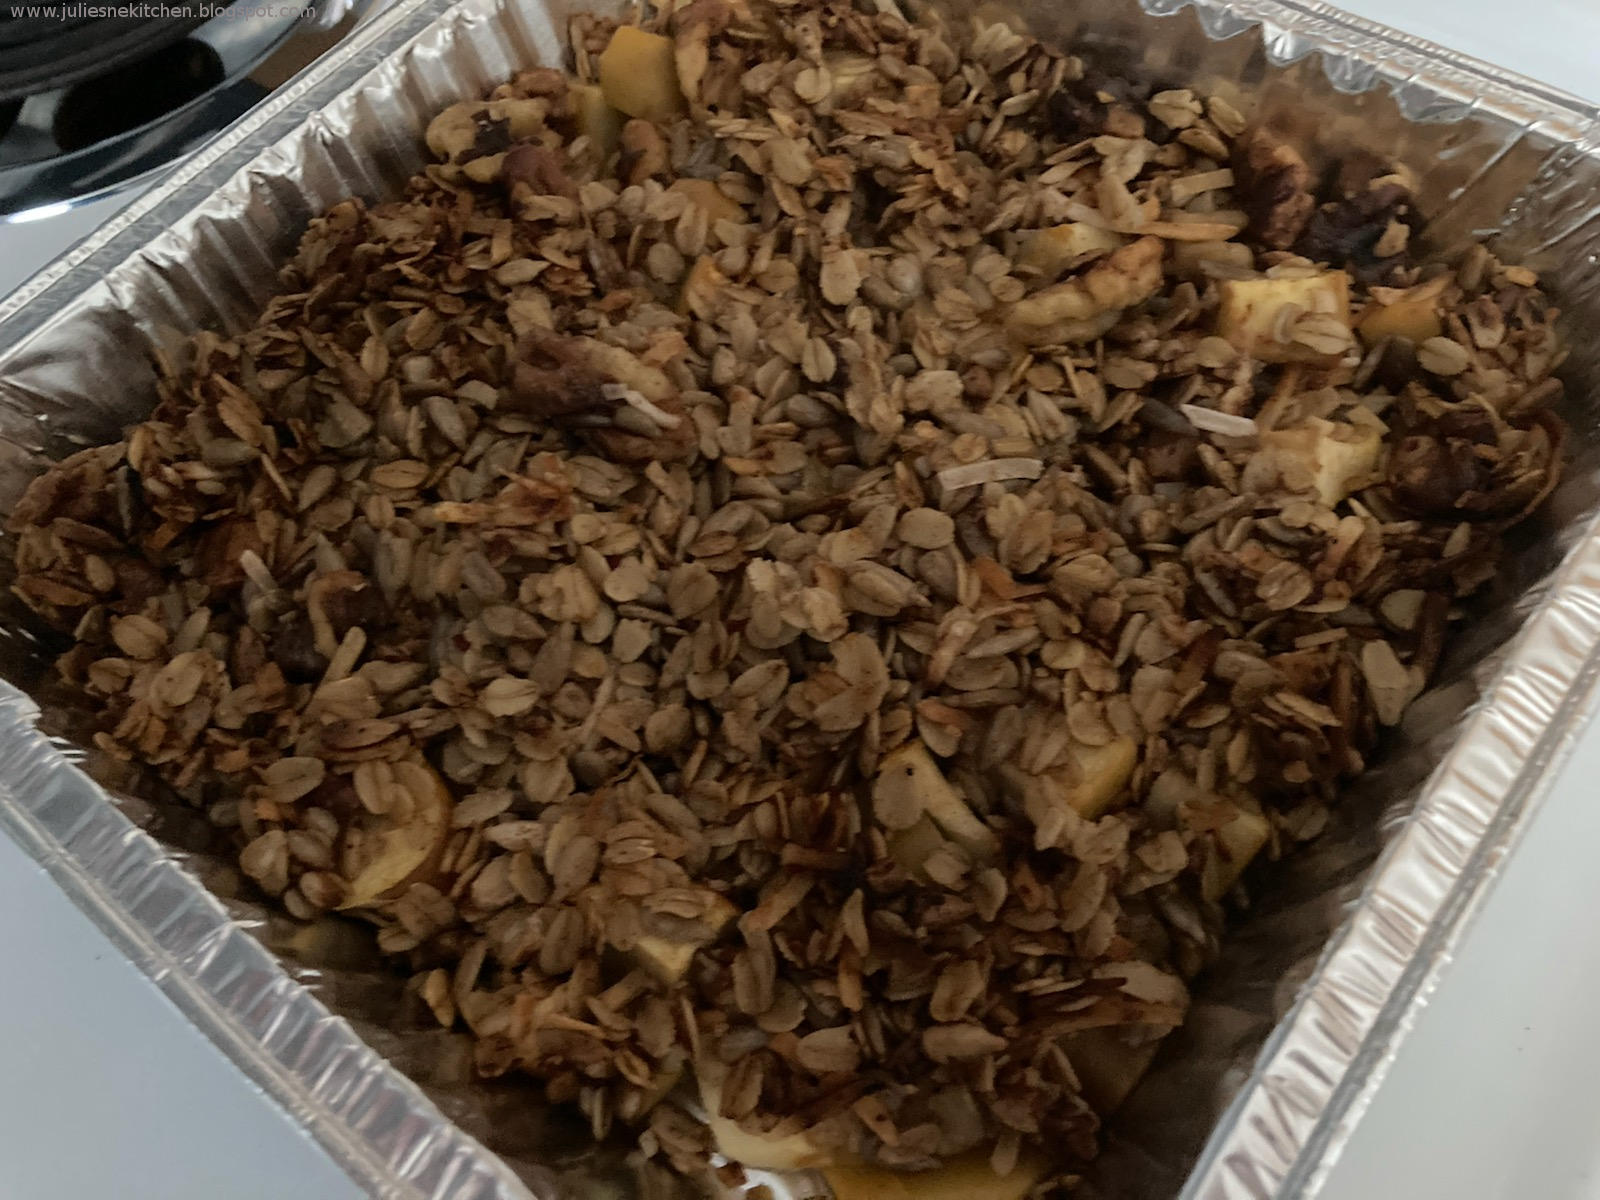
The original recipe was given to me verbally last September while I picked apples for homemade applesauce. I don't remember the ingredients but I know sugar, honey, maple syrup weren't amongst them. When I decided to try this recipe for the first time, I used Opal apples (which I didn't bother to peel as I was pressed time) and chose a variation of my No Sugar Added Granola Recipe for the topping. Second time, I used Cortland apples (which I peeled) and the same topping.  Sadly, this is not another “What to do with One Ripe Banana” recipe.

I recommend using a good baking apple such as a Cortland if you like sweet or a Granny Smith if you prefer tart. 

No Sugar Added Apple Crisp (makes 2-4 servings) 

2-3 medium apples or 2 large apples (this is about 1 pound of apples), peeled, cored and diced into large chunks 
3/4 cup quick cook old-fashioned rolled oats 
1/2 cup raw sunflower seeds 
1/4 cup unsweetened shredded coconut 
1/4 cup chopped walnuts 
3 ½ tablespoons unsweetened applesauce 
2 tablespoons olive oil 
1/2 teaspoon cinnamon 
pinch kosher salt (optional) 
pinch ground nutmeg (optional) 
¼ cup raisins (optional) 

1) Place oven rack on middle run setting and preheat oven to 350 degrees farenheit. 

2) In medium bowl, mix oats, sunflower seeds, shredded coconut, nuts, salt (optional), cinnamon, nutmeg (optional), applesauce, olive oil. Mix until dry ingredients are coated.  Set aside.

3) Peel, core and dice apples into large chunks. Place apples in bottom of 8-inch by 8-inch baking dish. Evenly top apples with oatmeal mixture. 
4) If you like a sweet apple crisp, top oatmeal mixture with raisins. 

5) Bake 35-45 minutes or until majority of topping is golden to toasty brown. 
6) Remove crisp from oven and let cool 30 minutes before serving. 

7) Store any leftovers in airtight container in refrigerator.


First version of this recipe, waiting to cool
before tasting

Sunday, March 17, 2024

Peanut Butter Cupcakes (makes about 24 cupcakes)

A recent perusal through recipes uncovered this one from my Better Homes and Garden New Cook Book (7th printing) which I haven't made for many years. I'd top these cupcakes with chocolate frosting

Peanut Butter Cupcakes

½ cup peanut butter 
1/3 cup shortening or butter 
1 teaspoon vanilla extract 
1 ½ cups brown sugar 
2 eggs 
2 cups all-purpose flour 
2 teaspoons baking powder 
½ teaspoon salt 
¾ cup milk 

Set oven rack to middle rung. Preheat oven to 375 degrees farenheit. 

In a large bowl, cream together peanut butter, shortening or butter and vanilla extract. Gradually add brown sugar, beating until light and fluffy. Add eggs, one at a time, beating well after each. 

Sift together flour, baking powder and salt; add alternately with milk. Mix thoroughly. 

Place bake cups in muffin pans; fill ½ full with cupcake batter.  

Bake cupcakes 20 minutes or until done. Cool in muffin pans for 5 minute before turning onto racks. Let cupcakes cool completely before frosting. 

Store cupcakes in air tight container.