Tuesday, January 6, 2015
Trader Joe's Peanut Butter Yum Yums or Super Yummy No-Bake Peanut Butter Crisp Rice Cereal Treats
If you love sweets, peanut butter or rice krispie treats, I suggest you move on to something else immediately as this is an addictive recipe. I stumbled across this recipe on the box of Crisp Rice Cereal at my local Trader Joe's and chose to try it as one of my twelve new recipes for 2012. On my first attempt to make this, only half of the recipe made it to step 8 (refrigerate or freeze to set). This was not due to any disaster with the recipe. It's just that good.
As this is a sticky treat, I found the extra step of lining the baking pan with aluminum foil whose edges hang over the side of the baking pan help in removing these from the pan to a flat surface to cut into bars.
Trader Joe's Peanut Butter Yum Yums
Non-stick cooking spray, for pan
Aluminum foil, for pan
1 cup Trader Joe's Brown Sugar
1 cup Trader Joe's Blue Agave Syrup
1 cup Trader Joe's Peanut Butter (creamy salted stye suggested)
7 cups Trader Joe's Crisp Rice Cereal
1. Line 13" X 9" plan baking pan with aluminum foil, letting edges of foil hang over side of pan. Spray aluminum foil with non-stick cooking spray. Set aside.
2. Measure Crisp Rice Cereal. Set aside.
3. Measure Peanut Butter. Set aside.
4. In a 3 quart saucepan combine brown sugar and agave syrup. Bring to near boil, stirring often. Continue stirring until brown sugar dissolves. Remove from heat.
5. Add peanut butter to mixture. Mix well.
6. Add Crisp Rice Cereal to mixture. Mix well.
7. Pour mixture into greased baking pan and top with a piece of waxed paper. Press the mixture firmly and evenly into the pan.
8. Remove wax paper and refrigerate for several hours to cool and harden. To harden more quickly, place in freezer for about an hour.
Makes about 16-2" squares.

Friday, December 19, 2014
Chickpea Ragout or a fast versatile dish
According to Merriam-Webster's on-line
dictionary, a ragout is a stew of meat, vegetables and spices.
This dish is a variation on a recipe
which appeared in the Feburary 15, 2009 Parade Magazine. It's a fast
dish to prepare which can be served as a soup, a side dish or as main
entree. Use vegetable broth instead of chicken broth and you have a
meat-free dish.
I've found this to be great cold day
dish and my preference is to make this on the first chilly days of
October when onions and the last of the season's tomatoes are
available at the local farmer's market. I usually serve this as a
soup with a small salad and bread on the side.
2
tbsp extra-virgin olive oil
1
small to medium onion, diced
2
tbsp minced garlic or 2 tbsp crushed garlic cloves
1
tsp ground cumin
1
can (19 oz.) drained and rinsed or 2 cups chickpeas
1/2
tsp dried thyme
1
medium to large tomato, diced or 1 (15 oz.) can diced tomatoes
2
tsp agave nectar or 2 tsp honey
2
tsp lemon juice
1
cup chicken or vegetable broth
Black
Pepper to taste
- Using a 3 quart pot, heat the oil over medium to medium-high heat. Add the onion and garlic and sautee until onion begins to brown, approx. 2-5 minutes. Sprinkle with cumin and stir to mellow.
- Stir in chickpeas, tomatoes, thyme, agave nectar or honey, lemon juice, and broth. Bring to a boil, reduce heat, season with black pepper, and simmer for 4 minutes.
- Taste the chickpeas and adjust the seasonings as needed.
- Serve as is in soup bowl, with bread or over prepared couscous or rice.
- Stored any unused portion in air-tight and spill-proof container in refrigerator.
Thursday, November 27, 2014
Pecan Cranberry Granola
My first new recipe of 2014 was granola. This was inspired by the homemade granola my
girlfriend, Sally, served me when I visited her in early December.
I deviated completely from her recipe as I wanted to try
the Tasty Olive Oil Granola recipe which appeared in the December 2012 issue of
Yoga Journal. As I read this recipe, I
made modifications and substitutions, resulting in the below Pecan Cranberry
Granola recipe.
Pecan Cranberry Granola
(makes 3 cups)
1 ½ cups old-fashioned rolled oats or Trader Joe's quick
cook steel cut oats
1 cup raw sunflower seeds
½ cup shredded coconut
5/8 cup raw pecans
3/8 cup pure maple syrup, preferably grade B or organic
agave nectar
¼ cup extra virgin olive oil
¼ cup packed light brown sugar
¼ teaspoon kosher salt
¼ teaspoon cinnamon
1/8 teaspoon nutmeg
½ cup dried cranberries
1.
Preheat oven to 300 degrees farenheit.
2.
Place the oats, sunflower seeds, shredded
coconut, pecans, salt, cinnamon and nutmeg in a large bowl. Mix until well combined.
3.
Add the brown sugar, olive oil, maple syrup or
agave nectar. Mix until dry ingredients
are coated.
4.
Add dried cranberries. Mix.
5.
Spread mixture in an even layer on a medium- to
large-size cookie sheet.
6.
Bake, stirring every 10 minutes, until granola
is golden and toasty-about 45 minutes.
7.
Remove granola from oven and let cool.
8.
Store in an airtight container.
Friday, October 17, 2014
Kale Krisps
In previous years, fall was the time of year when kale would be in abundance at local farmer's markets. But not this year. I've noticed many varieties of kale this spring and summer.
Irregardless, with cooler weather on it's way here in New England, it's a good time to fire up the oven and make Kale Krisps. According to my 1995 edition of The Nutrition Bible, kale is a member of the cabbage family. It grows well in cool, moist climates in poor soil and tends to peak in winter. It's also a good source of vitamins A , C and K.
Irregardless, with cooler weather on it's way here in New England, it's a good time to fire up the oven and make Kale Krisps. According to my 1995 edition of The Nutrition Bible, kale is a member of the cabbage family. It grows well in cool, moist climates in poor soil and tends to peak in winter. It's also a good source of vitamins A , C and K.
While I've seen many recipes for Kale Krisps, this one is adapted from a version which appeared in the
March 2011 issue of Yoga Journal whose source is noted as an
adaptation from Ripe from Around Here: A Vegan Guide to Local and Sustainable Eating by Jae Steele. I like this recipe as the ingredients are basic,--kale, olive oil, balsamic vinegar and with a low oven setting, the risk of over baking is reduced.
Where kale is a member of the cabbage
family, the aroma produced when making kale krisps may not be the
most aromatic. I was not aware of this until after the first time I made this
recipe. This answered my question as to why when making this my house smelled
like my grandmother's after she had been cooking cabbage to make
stuffed cabbage. Therefore, be forewarned.
Despite the odor, these do not last
long in my house. Half are usually consumed as they come out of the
oven. The remainder are gone within two days, generally in one
sitting.
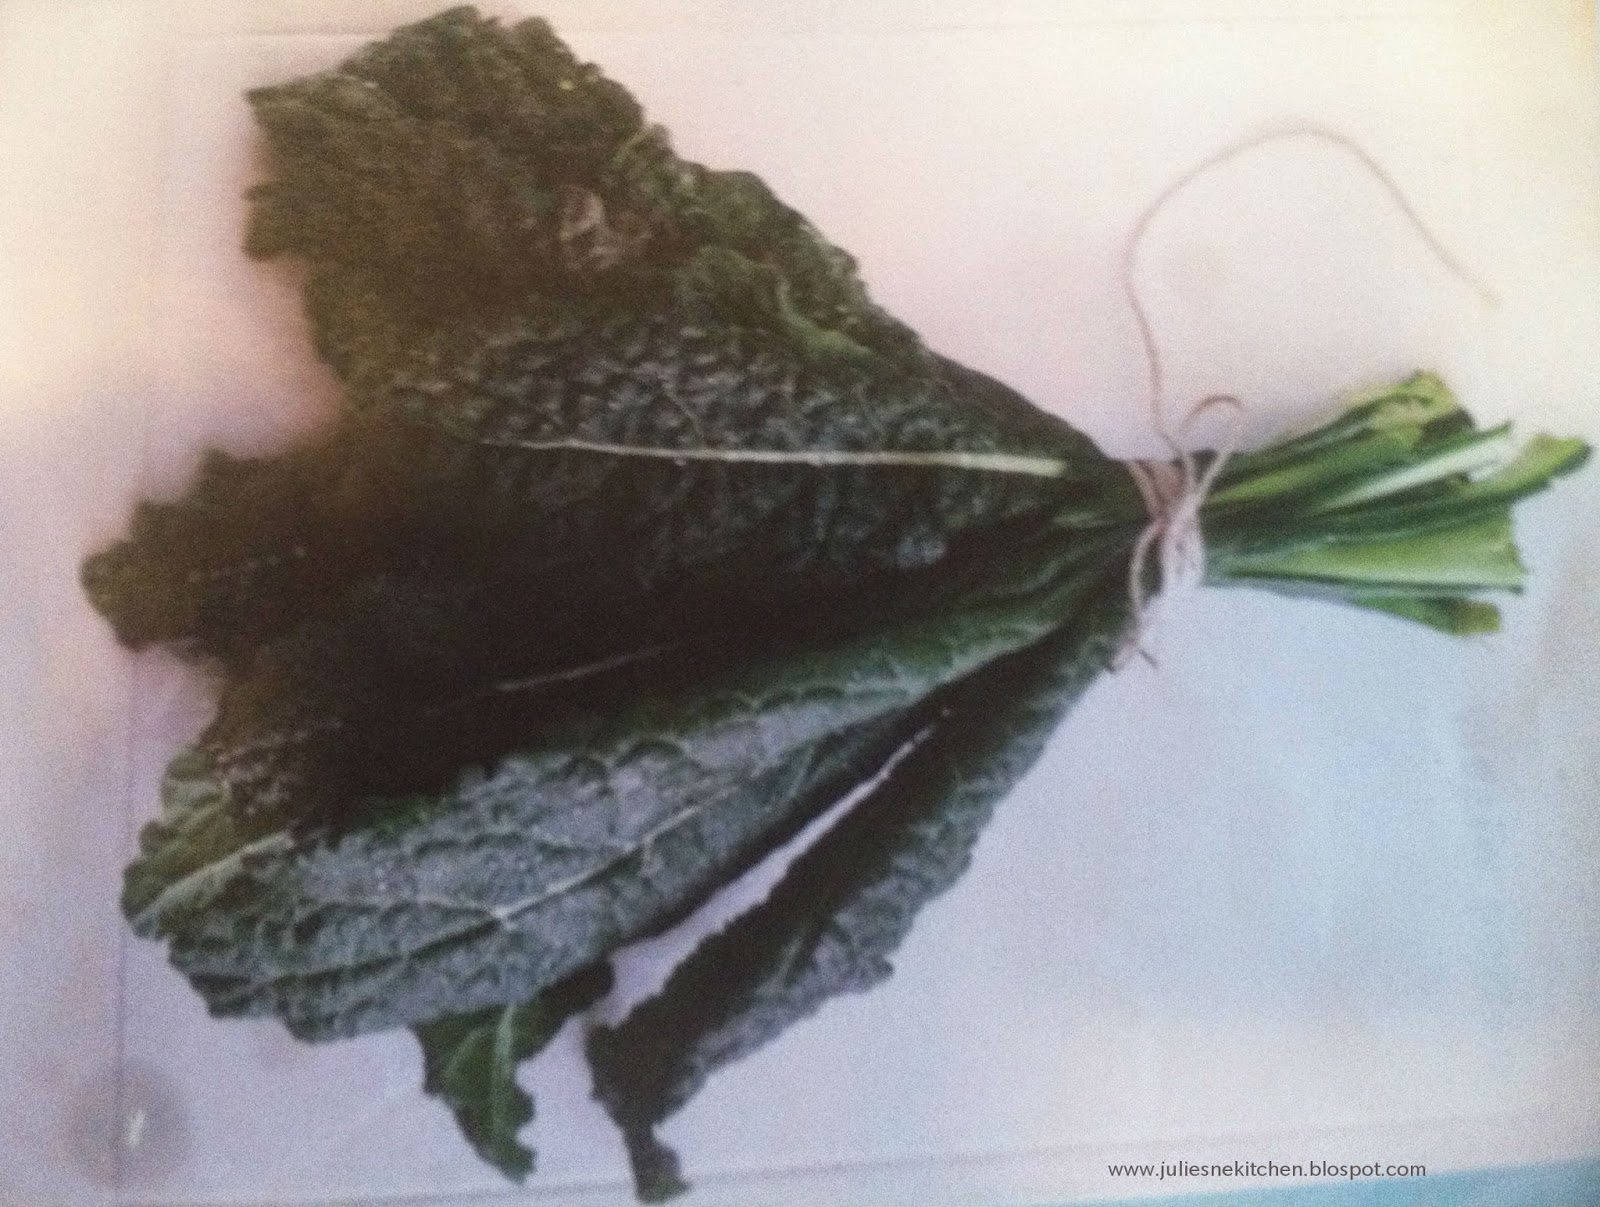
dinosaur, lacinato or tuscan kale
Kale Krisps
1 bunch dinosaur, lacinato or tuscan kale,
washed and stemmed
4 tablespoons olive oil
2 tablespoons balsamic or red wine
vinegar
Kosher salt, to taste
- Put oven rack on middle setting. Preheat oven to 250 degrees farenheit.
- Chop kale into 3 inch pieces.
- In a large bowl, mix oil and vinegar. Add kale and toss until the leaves are evenly coated.
- Line a cookie sheet with aluminium foil and coat the foil with non-stick cooking spray. Spread the leaves in a single layer and sprinkle lightly with kosher salt.
- Place in oven until dry and crisp,
approximately 40 minutes to 1 hour.
 lacinato kale krisps ready for serving
Monday, September 22, 2014
Applesauce with a Rosy Glow or the only applesauce recipe I’ve ever tried
As I noted in an earlier post, you know
it’s December at my house when all that’s produced is AlmondRoco. Likewise, you know it’s fall at my house when all that comes
from my kitchen contains apples, such as applesauce.
As a child I would only eat applesauce
if it was served with pork chops for dinner. As for eating apples, I
think I ate two by the time I was eighteen years old. Yes, my
palette, food preferences and diet have changed significantly since
my childhood.
My love for homemade applesauce took
hold just over a decade ago after making vegan whoopie pies with my
homemade applesauce and liking the richness of flavor this applesauce
provides to this recipe over store bought sauces. For several years,
my freezer would be packed in September with homemade applesauce and
gradually emptied over the following winter and spring to make vegan whoopie pies, to top oatmeal or some form of vanilla ice cream. In
late 2005 I learned how to can and successfully canned my first batch
of applesauce in September 2006. I’ve canned my homemade
applesauce ever since.
While some of you might be surprised at
the amount of applesauce which gets produced annually, I can only
tell you the happiness, joy and fond memories generated is far
greater than the time and effort exerted. My cousin, Jenn, and her
family join me at the orchard where we pick apples for all of us.
When the apple picking is done, we then walk to the orchard’s farm
stand for their homemade apple cider doughnuts. One year my mom
assisted in coring and slicing the apples. Another year a girlfriend
visited during the process and assisted with tasting the batch. A half pint jar given to a co-worker one
morning was returned the same afternoon, emptied, washed, and with
the statement “That was good.”
I originally came across this recipe in
an issue of the Boston Herald sometime in the 1990s. I don’t have
the exact date as the recipe was not in the corner of the page which
contained the date. What I like most about this recipe is it’s a
great way to use up lots of apples quickly without having to peel
them. I’ve tinkered with the recipe over the years, increasing the
amount of sugar and cinnamon to make a rich “sweet” batch,
removing the sugar and cinnamon to create an unsweetened batch, as
well as moving the “mash” process from stove top to oven to
prevent the apples from scorching or “blackening” the bottom of the pot which
can require a lot of time and manpower to scour clean.

Apples ready to be made into "mash" in
the oven
Rosy
Applesauce yield:
approximately 6 – 9 pints
5-6
pounds red-skinned applesauce (this is about a 1/2 peck of apples)
½
cup water
1
cup sugar
½
cup light brown sugar
1
teaspoon cinnamon
To
make “mash” on stove top:
- Wash, quarter and core the apples.
- Place them in large saucepan with the water.
- Cook over very low heat until the pulp softens and separates from the peel – from 30 minutes to an hour. Stir occasionally to avoid scorching.
To
make “mash” in the oven:
- Place oven rack on lowest setting.
- Pre-heat oven to 425 degrees farenheit.
- Wash, quarter and core the apples placing them in a turkey roasting pan designed to hold 12 – 15 pound turkey.
- Add water to apples in pan.
- Tent/loosely cover top of roasting pan with aluminum foil, making certain reflective side of foil faces apples.
- Carefully place tented roasting pan with apples and water in oven on rack on lowest setting.
- Bake until pulp softens and separates from the peel without effort when pressed with large spoon – from 30 minutes to just over an hour.
Once
“mash” is made:
- Press “mash” through a food mill or colander.
- Add sugar and cinnamon to the warm applesauce, mix thoroughly, and let stand until cool enough to eat.
- Serve either warm or chilled. Refrigerate any unused portion for up to 5 days, freeze for up to 3 months or can the applesauce using the boiling-water method in steps 4 and 5.
- Heat the applesauce until it boils. Ladle into clean, hot canning jars, leaving ½ inch of headspace at the top of each.
- Close the jars and process in a water-bath canner with a rack for 20 minutes.
Wednesday, September 3, 2014
Apple Lemon Bread
I stumbled across this recipe several
years ago in my Fanny Farmer Cookbook at about the same time I was
introduced to local grown Mutsu (or Crispin) apples whose texture and
moistness remind me of a Granny Smith and whose taste reminds me of a
Jolly Rancher Sour Apple Stix.
Where the recipe calls for green
apples, I decided to give this one a try with local Mutsu apples. On
the day I made the first batch, my mother stopped by just as the
bread was coming out of the oven. What's noted in my version of this
recipe is correct: “Light and moist, flavored with apple and lemon
zest, this bread freezes well, if there is any left.” There was
none left of the first batch nor of the second. The third batch did
get frozen, and yes, this bread does freeze incredibly well. I
highly recommend this recipe if you ever find yourself with extra
Mutsu apples in September or October which is their peak season.
Apple Lemon Bread
From the revised 13th
edition of The Fanny Farmer Cookbook.
Yield: One 9” x 5” x 3” loaf or
12-19 muffins
¼ cup butter or substitute, such as
Earth Balance Buttery Spread
(http://www.earthbalancenatural.com/product/original-buttery-spread/)
¾ cup sugar
2 eggs, beaten
2 cups flour
1 tsp baking powder
1 tsp baking soda
1 tsp salt
2 green apples, peeled, cored, and
grated (about 2 cups) or 1 very large Mutsu apple, peeled, cored and
grated
Zest or peel from 2 lemons, minced
(approximately 1 ½ tablespoons)
Preheat the oven to 350 degrees
farenheit. Butter or grease a loaf pan. In a large bowl, cream
together the butter and sugar until light and fluffy. Beat in the
eggs until blended. Mix the flour, baking powder, baking soda, and
salt together and add to the creamed mixture alternately with the
grated apple. Add the lemon zest and mix until well blended. Spoon
into the loaf pan and bake for 50-55 minutes or until a toothpick
inserted in the center of one of the center muffins comes out clean.
Remove from the pan and cool on a rack.
If making muffins, spoon batter into
lined muffin tins. Baked for 20-30 minutes or until a toothpick
inserted in the center of one of the center muffins comes out clean.
Cool and then remove from tins.
Monday, July 21, 2014
Freezing green and other bell peppers
When the bell peppers come in to season
here in New England, as they are doing right now, I'm known for
picking up 2 – 4 peppers per week at the farmer's market, seeding
and slicing them prior to putting them in the freezer. I've found
that green and other bell peppers,--red, yellow, etc.,--freeze well
and cook up nicely in a stir fry, a dish of sausage, peppers and
onions, black bean sloppy joe, mushroom, peppers and onions, fajitas.
As I begin to re-stock my freezer with
bell peppers, I thought I would share with you the steps I follow for
freezing and using peppers I get at the farmer's market:
To freeze bell peppers, you’ll need:
Sandwich size ziploc storage bags,--one
bag per pepper
Gallon size freezer safe ziploc storage
bags,--one bag for every 4 peppers
Knife
Cutting board
Wash and dry peppers.
Slice and de-seed peppers, placing
slices in ziploc sandwich bag. One bag should contain the slices
from one pepper. Repeat as many times as needed.
When all peppers have been sliced and
bagged, seal sandwich bags. Put sandwich bags into freezer safe
gallon size ziploc bag. You should be able to fit 5 – 7 bags of
peppers into one gallon size bag. Seal freezer safe gallon size bag
and put in freezer.
The peppers will keep for about 6 –
12 months and can be used in stir fries, fajitias or any recipe
which calls for cooked or sauteed peppers such as black bean sloppy
joe. Keep in mind, the longer the peppers are in the freezer they
more likely they are to lose flavor.
When ready to use, remove the number of
peppers/bags from the freezer. Let thaw on the kitchen countertop
for 1 – 3 minutes. Break peppers loose by pressing heel of hand on
peppers while in bag on countertop. Open bag and add peppers to
recipe.
Subscribe to:
Posts (Atom)